Natalie's Blog The latest in Real Estate and Fine Living

Home Improvement

Develop A Landscape Plan To Fit Your Budget (video)

By: Laura Fisher Kaiser

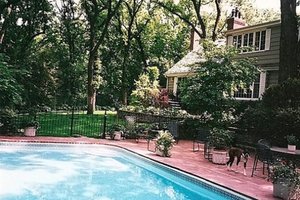
Scroll over, then click on photo to play video. For more videos and articles about home improvement visit our Resource Center.

Use tracing paper to plan out a landscaping project. Additional home improvement videos can be found at DannyLipford.com.

Landscaping is one of the surest ways to pump up the value of your property. According to research by Virginia Cooperative Extension, going from a plain lawn and a concrete driveway to a well-landscaped lot raises a home’s perceived value by 12.7%. The opposite is also true: A “minimal” landscaping job—a thoughtless smattering of scraggly plants—actually detracts from home value.

How much should you invest in upgrading your landscape? Professionals recommend budgeting 10% of your home’s value. But the important thing to remember is that success doesn’t depend on how much you spend. “Landscaping doesn’t have to be expensive, just well planned,” says Carl Heldmann, author of “Be Your Own House Contractor.” Here’s how to get started on a landscape plan of your own. 

First, consult a pro

To figure out how to allocate your landscape dollars, start by picking the brain of a pro. Even if you have a naturally green thumb, a trained professional can save you from wasting money on wrongheaded ideas and open your eyes to possibilities you haven’t considered. There are various types of landscape pros, and their expertise is priced accordingly.

If your yard has major issues or you have grand ambitions, consider hiring a certified landscape architect to design a comprehensive plan that includes such things as irrigation, lighting, architectural features, soil conditioning, and, of course, the growing stuff. A verbal consultation costs about $100-$150; a detailed plan can run from $300 to $2,500. The American Society of Landscape Architects offers a state-by-state “firm finder” on its website.

Landscape designers typically charge less than degreed landscape architects and are a good choice for simpler projects that don’t require construction. Horticulturists specialize in plants, not necessarily design. Then there are landscape contractors, the design-build firms of yard work. Start by asking friends whose gardens you admire for recommendations. Your local home and garden center is another good source for contacts.

Set your priorities

Before you get any dirt under your nails—or hire someone to get dirty—you need to make two lists: a) what you want and b) what your property needs. These aren’t necessarily mutually exclusive, but the exercise is important for setting priorities. It would be folly to spend big bucks on an outdoor kitchen before resolving potentially disastrous issues such as a diseased tree or drainage problems.

The first question that a professional will likely ask is: What do you see yourself doing in your yard? Hosting Sunday barbecues? Doing the crossword puzzle in a hammock? Swimming laps? Growing vegetables? Clip pictures of outdoor spaces you like and don’t like to clarify the feeling you’re trying to achieve.

Remember that part of your landscape budget will go toward the “b” list. Those are things that may not lend themselves to sexy magazine spreads but can protect your property value—not to mention enhance your quality of life—by lowering water bills, reducing the need to mow or rake, or blocking the view of your neighbor who hot-tubs in the buff. We’re talking about practical considerations such as irrigation, fencing, lighting, equipment storage, privacy, and security.

Create a “floor plan” to target costs

To ballpark costs for materials and labor, think in terms of square footage, which is how landscapers charge. According to Costhelper.com, hiring someone to create a “naturalistic garden” averages $11 a square foot; the cost can double for a formal garden with walls and water features. And don’t forget to factor in long-term maintenance such as mowing, mulching, and pruning. (Sweat equity, anyone?)

If you’re designing your own plan, start by measuring your property or getting a plat survey from the county. You might even be able to find a topographical map indicating features like slopes and swales. You can sketch the basic layout to scale using old-fashioned graph paper or landscape design software. Prices have come down considerably on the latter, but quality varies widely, so check online reviews before purchasing. A free option: Google’s
Sketchup, with cool apps for trees, pavers, shrubs, outbuildings, and the like.

Once you have the parameters, create a floor plan, marking off different sections just as you would rooms of a house. The front path is the foyer, there might be a “dining room” with a picnic table, a shady “bedroom” for a hammock, a “rec room” with play equipment. Consider the costs for each area of your plan, including materials, equipment, furnishings, greenery, and any specialized labor like irrigation or electricity. 

Think long term

If your ambitions exceed your wallet (and whose do not?), go back to your priority list and pick a section or projects to tackle as your budget permits, advises Angela Dye, principal designer/president of A Dye Design, a landscaping firm in Phoenix, Ariz. “What is the absolute most important thing you need to have done?” she asks. “What is bugging you most?”

A carefully conceived plan will keep you on track during this gradual transformation, both in terms of vision and budget. And remember that patience pays off. “Additions or renovations can start losing value once completed,” says Jim Lapides, spokesman for the American Society of Landscape Architects. “A landscape literally grows in value over time.”

Laura Fisher Kaiser is a contributing editor to Interior Design magazine and a former editor at This Old House magazine. The secret to her Washington, D.C., garden is blood, sweat, tears, and mosquito repellent.

Video provided by Today’s Homeowner host, Danny Lipford.

Used with permission of the NATIONAL ASSOCIATION OF REALTORS®. Copyright 2010.

Home Improvement

Seven Smart Strategies For Kitchen Remodeling

My clients often ask which home improvements will bring them the most resale value. This is an important question whether you are deciding which home to purchase, or would prefer to update your current home rather than purchasing a new one - without losing money in the long run. Kitchens rank at the top of the list as to bringing a high benefit while you are in the home and when you sell the home. John Riha's article below is filled with great information regarding remodeling your kitchen. You can find more resources regarding your kitchen and much more in our resource center.


If you’re contemplating a kitchen remodel, you’re also weighing a considerable investment. But a significant portion of the upfront costs may be recovered by the value the project brings to your home. Kitchen remodels in the $50,000 range recouped 76% of the initial project cost at the home’s resale, according to recent data from Remodeling Magazine’s Cost vs. Value Report. To make sure you maximize your return, consider these seven smart kitchen remodeling strategies. 

1. Establish your priorities

Simple enough? Not so fast. The National Kitchen and Bath Association (NKBA) recommends spending at least six months planning before beginning the work. That way, you can thoroughly evaluate your priorities and won’t be tempted to change your mind during construction. Contractors often have clauses in their contracts that specify additional costs for amendments to original plans. Planning points to consider include:

  • Avoid traffic jams. A walkway through the kitchen should be at least 36 inches wide, according to the NKBA. Work aisles for one cook should be a minimum of 42 inches wide and at least 48 inches wide for households with multiple cooks.
  • Consider children. Avoid sharp, square corners on countertops, and make sure microwave ovens are installed at the heights recommended by the NKBA—3 inches below the shoulder of the principle user but not more than 54 inches from the floor.
  • Access to the outside. If you want to easily reach entertaining areas, such as a deck or a patio, factor a new exterior door into your plans.

Because planning a kitchen is complex, consider hiring a professional designer. A pro can help make style decisions and foresee potential problems, so you can avoid costly mistakes. In addition, a pro makes sure contractors and installers are sequenced properly so that workflow is cost-effective. Expect fees around $50 to $150 per hour, or 5% to 15% of the total cost of the project.

2. Keep the same footprint

No matter the size and scope of your planned kitchen, you can save major expense by not rearranging walls, and by locating any new plumbing fixtures near existing plumbing pipes. Not only will you save on demolition and reconstruction, you’ll greatly reduce the amount of dust and debris your project generates.

3. Match appliances to your skill level

A six-burner commercial-grade range and luxury-brand refrigerator might make eye-catching centerpieces, but be sure they fit your lifestyle, says Molly Erin McCabe, owner of A Kitchen That Works design firm in Bainbridge Island, Wash. “It’s probably the part of a kitchen project where people tend to overspend the most.”

The high price is only worth the investment if you’re an exceptional cook. Otherwise, save thousands with trusted brands that receive high marks at consumer review websites, like
www.ePinions.com and www.amazon.com, and resources such as Consumer Reports.

4. Create a well-designed lighting scheme

Some guidelines:

• Install task lighting, such as recessed or track lights, over sinks and food prep areas; assign at least two fixtures per task to eliminate shadows. Under-cabinet lights illuminate clean-up and are great for reading cookbooks. Pendant lights over counters bring the light source close to work surfaces.

• Ambient lighting includes flush-mounted ceiling fixtures, wall sconces, and track lights. Consider dimmer switches with ambient lighting to control intensity and mood.

5. Focus on durability

“People are putting more emphasis on functionality and durability in the kitchen,” says McCabe. That may mean resisting bargain prices and focusing on products that combine low-maintenance with long warranty periods. “Solid-surface countertops [Corian, Silestone] are a perfect example,” adds McCabe. “They may cost a little more, but they’re going to look as good in 10 years as they did the day they were installed.”

If you’re not planning to stay in your house that long, products with substantial warranties can become a selling point. “Individual upgrades don’t necessarily give you a 100% return,” says Frank Gregoire, a real estate appraiser in St. Petersburg, Fla. “But they can give you an edge when it comes time to market your home for sale” if other for-sale homes have similar features.

6. Add storage, not space

To add storage without bumping out walls:

• Specify upper cabinets that reach the ceiling. They may cost a bit more, but you’ll gain valuable storage space. In addition, you won’t have to worry about dusting the tops.

• Hang it up. Install small shelving units on unused wall areas, and add narrow spice racks and shelves on the insides of cabinet doors. Use a ceiling-mounted pot rack to keep bulkier pots and pans from cluttering cabinets. Add hooks to the backs of closet doors for aprons, brooms, and mops.

7. Communicate effectively—and often

Having a good rapport with your project manager or construction team is essential for staying on budget. “Poor communication is a leading cause of kitchen projects going sour,” says McCabe. To keep the sweetness in your project:

  • Drop by the project during work hours as often as possible. Your presence assures subcontractors and other workers of your commitment to getting good results.
  • Establish a communication routine. Hang a message board on-site where you and the project manager can leave each other daily communiques. Give your email address and cell phone number to subs and team leaders.
  • Set house rules. Be clear about smoking, boom box noise levels, which bathroom is available, and where workers should park their vehicles.

Consumers spend more money on kitchen remodeling than any other home improvement project, according to the Home Improvement Research Institute, and with good reason. They’re the hub of home life, and a source of pride. With a little strategizing, you can ensure your new kitchen gives you years of satisfaction.

John Riha has written six books on home improvement and hundreds of articles on home-related topics. He’s been a residential builder, the editorial director of the Black & Decker Home Improvement Library, and the executive editor of Better Homes and Gardens magazine. His standard 1968 suburban house has been an ongoing source of maintenance experience.

Used with permission of the NATIONAL ASSOCIATION OF REALTORS®.
Copyright 2010. All rights reserved.
 

Home Improvement

What To Consider Before Building A Pool

Are you considering building a pool? If so, the article below by Julie Sturgeon will assist you in taking the necessary steps to make your dream a reality. You can find a host of helpful information about pools and other home improvement topics in our resource center.Inground pool installed by Custom Pools, Inc., Minnesota

If you want the ultimate backyard gathering spot, nothing fits the bill like a swimming pool.

The decision to build an in-ground pool isn’t one to take lightly. Apart from the substantial installation costs, which typically run into the tens of thousands of dollars, you have to factor in ongoing maintenance expenses as well as insurance and tax implications. And you can’t be assured of recouping your investment when you sell; while a pool may be attractive to some buyers, others might be put off by the upkeep or safety concerns.

If you’re looking for bang for your buck at resale, an upscale kitchen or extra bathroom offers greater impact. But if you want the ultimate backyard entertainment amenity and social gathering spot, nothing fills the bill like a swimming pool. Thinking about taking the plunge? Here’s a look at how the numbers add up. 

Ballpark your installation costs

The average cost in the U.S. to install, equip, and fill a 600-square-foot concrete pool starts at $30,000. Add in aesthetic details like waterfalls, lighting, landscaping, and perhaps a spa, and you’re easily looking at totals approaching six figures.

Concrete is the most expensive pool material, but it’s also the most durable and offers the most options for customization. Fiberglass shells and those with vinyl liners fall on the lower end of the budget scale, but the liners typically need replacing every 10 or so years. Changing the liner requires draining the pool and replacing the edging (called coping), so over time costs add up. Most home buyers will insist that you replace a vinyl liner, even if it’s only a few years old.

Decide on a filtration and heating system

The filtration pump is the biggest energy hog in a pool system, so you want to get the most efficient pump possible. The good news here is that new, variable-speed pumps use up to 80% less energy than old single-speed pumps, cutting operating expenses dramatically. At about $1,500, these cost more up front, but some local utilities offer rebates through participating pool dealers. You can further cut energy costs by setting the pump to run at non-peak times, when rates for electricity are lower.

If you’re planning to heat your pool, gas heaters are the least expensive to purchase and install, but they typically have the highest operation and maintenance costs. Many pool owners opt instead for electric heat pumps, which extract heat from the surrounding air and transfer it to the water. Heat pumps take longer than gas to warm the pool, but they’re more energy-efficient, costing $200 to $400 less to operate per swimming season. Regardless of heating system, covering the pool with a solar blanket to trap heat and reduce evaporation will further lower operating costs.

Account for ongoing maintenance expenses

All pools require that the water be balanced for proper pH, alkalinity, and calcium levels. They also need sanitizing to control bacteria and germs, which is where chlorine has traditionally entered the picture. These days you have a variety of options, including systems that use bromine, salt, ozone, ionizers, or other chemical compounds that can be less irritating to skin. Chlorine remains the most popular because the upfront costs are reasonable, and you don’t have to be as rigid about checking the levels on a set schedule. But as far as your wallet is concerned, they all even out in the end.

In a seasonal swimming climate, budget about $600 annually for maintenance if you shoulder the chemical balancing and cleaning yourself; in a year-round climate, it’s more like $15 to $25 per week. To save yourself the task of once-a-week vacuuming, you can buy a robotic cleaning system for between $500 and $800 that will do the job for you. In locations where the pool must be opened and closed for the season, add another $500 each time for a pro to handle this task.

Factor in insurance and tax implications

A basic homeowners insurance policy typically covers a pool structure without requiring a separate rider, but you should increase your liability from the standard amount. It costs about $30 a year to bump coverage from $100,000 to $500,000. Many underwriters require you to fence in the pool so that children can’t wander in unsupervised.

In some areas, adding a pool may increase your annual property taxes, but it won’t necessarily add to your home’s selling price. For that reason, try to keep your total building cost between 10% and 15% of what you paid for your house, lest you invest too much in an amenity that won’t pay you back.

Julie Sturgeon has written about residential pools for nearly a decade. Her family was clueless when they bought a home with an in-ground pool, but they have avoided making a major mistake with it yet.

Used with permission of the NATIONAL ASSOCIATION OF REALTORS®. Copyright 2010.
All rights reserved.
 

Home Improvement

The Best Time To Plant a Tree

The best time to plant a tree was 20 years ago.  The next best time is now.  ~Chinese Proverb

Trees are a valuable asset to a home, here a just a few examples:

Shade

  • Some plants and flowers do not grow well in direct sunlight. The shade of the trees allows you to plant a multi layered landscape that you couldn't without the shaded area.
  • Trees can shade windows so that the fabrics of your home such as draperies, flooring, and upholstery, along with other items in your home, so they will not fade as quickly.
  • Summer time in the San Joaquin Valley is HOT! Trees can cool the temperature of home, outdoor living areas, and parked vehicles depending on where they are planted

Beauty

  • Trees can be a backdrop for additional landscaping and give your home beautiful curb appeal.
  • Each tree is unique in the style it creates which can help to create a look that in turn creates a feel that creates additional enjoyment of your home. For example, you can create a tropical get away with palm trees as one of your features around a pool. Having a large pine tree shedding needles into the pool daily won't create that getaway feel!

Increased value

  • When you sell your home in the future you will have more mature vegetation which increases the value of your home both to you in the sales price, and to the buyer. As our Chinese proverb reminds us. If you haven't already planted that tree, plant it today!

Trees are also a wonderful benefit to a community. The City of Visalia, builders, and neighborhoods have decided to line streets with trees. Downtown Visalia has had a tree makeover over the past few years as trees were planted to create beautifully lined streets as the trees grow and mature. Some new neighborhoods are creating tree lined streets, while some older neighborhoods have planted trees many years after the neighborhood was built. In the years to come we will see more and more mature trees creating beautifully tree lined streets.

The benefits of trees are not limited to aesthetics or monetary value. There are many health benefits as well such as cleaner air and fewer sunburns at picnics!

When considering planting trees there are many factors to consider. Do you want native trees that require less water? What size tree is to scale with my home once full grown? What trees shouldn't be planted near my home due to their roots growing out and not down?

A few years ago I attending a class on trees held by Brian Kempf with The Urban Tree Foundation here in Visalia. It was so informative and valuable. Brian has been instrumental in working with the City of Visalia , many Visalia builders, and homeowners in neighborhoods who want to beautify Visalia with trees. Take a moment to visit The Urban Tree Foundation's website to learn more about trees - which ones to plant, how to care for them, and much more.

I leave you with this quote on this breezy day in Visalia.

Breeze is the conductor, trees the musicians, leaves the instruments.  ~Nathaniel LeTonnerre

Home Improvement

Top Kitchen Trends for 2010

By Melissa Dittmann Tracey, REALTOR Magazine

So what’s cooking in the kitchen this year? The National Kitchen & Bath Association surveyed designers to reveal the top design trends for 2010.

Among the trends gaining popularity this year: Hide your appliances in kitchen drawers, whether dishwashers-in-a-drawer or undercounter refrigeration (drawers being used as refrigerators). More home owners are opting to tuck their appliances away so they don’t interfere with the design.

Also part of the appeal to dishwashers-in-a-drawer is their convenience with the capability of washing small loads of dishes in each drawer, which saves water and electricity.
Here are some of the other top kitchen trends for 2010:

Color: Shades of white and off-whites are the most common kitchen colors, followed by brown, beige, and bone hues.

Cabinetry: The most popular wood for kitchen cabinetry remains cherry, followed by maple. In the decline: Painted cabinetry and light natural finishes and distressed finishes.

Design style: Traditional is the most popular kitchen design with contemporary following closely behind.

Flooring: Ceramic and porcelain tile and natural stone remain the most popular kitchen flooring. Hardwood, however, will dominate kitchens this year more than ever.

Countertops: Granite is the most popular option, but quartz is inching up to it in popularity.

Home Improvement

Comprehensive Spring-cleaning that Clears Your Bases

Spring-cleaning isn't what it used to be. In today's busy households, it
can be difficult for
one parent, let alone two, to find time to dedicate
to a big annual floor-to-ceiling deep cleaning. One solution is to
prioritize your tasks, taking a more realistic approach to home cleaning
and organizing. First, approach your cleaning by room, rather than
chore. Then, by separating spring must-do's from warmer-weather
good-to-get-done's, you can get essential tasks out of the way, and
apportion other work for later in the spring or early summer. Here are
some common-sense strategies to help refresh your home without
putting your life on hold this season.

KITCHEN

Spring-cleaning must-dos:

  • Deep-clean fridge and freezer
  • Sort and file items in junk drawer (look for income tax receipts!)
  • Self-clean oven interior if needed
  • Clean window interiors and exteriors

Can do later:

  • Almost any and all cleaning can be divided up and conquered year-round, including detailing tile, deep-cleaning and conditioning wood, washing walls, cleaning light fixtures

BATHROOMS

Spring-cleaning must-dos:

  • Cleaning window interiors and exteriors

Can do later:

  • Almost any and all cleaning can be divided up and conquered year-round, including detailing tile and grout, washing walls, cleaning light fixtures

LIVING AREAS

Spring-cleaning must-dos:

  • Replace winter drapery with summer curtains (send the former to the dry cleaners)
  • Clean light fixtures
  • Store any knickknacks that were on display over winter, replace with spring/summer accessories or fresh flowers

Can do later:

  • Almost any and all cleaning can be divided up and conquered year-round, including washing walls, cleaning molding and baseboards, cleaning and polishing wood, cleaning and protecting leather furniture. (If you can postpone larger cleaning tasks to summer, it may render the overall spring project less daunting.)

BASEMENT

Spring-cleaning must-dos:

  • Get rid of junk; donate items in good condition, dispose of broken items
  • Check furnace filters and replace if needed

Can do later:

  • Shop-vac any dust or debris from workshop
  • Mop floors
  • Clean windows indoors and out

CLOSETS

Spring-cleaning must-do:

  • Sort, clean and pack away winter clothing and sports gear and footwear, donating items no longer needed and disposing of any damaged items

Can do later:

  • Install a customized closet organization system if desired

GARAGE

Spring-cleaning must-do:

  • Put snow removal gear in storage
  • Store winter tires, if applicable
  • Shop-vac and (if needed) degrease floor

Can do later:

  • Dust ceiling rafters
  • Clean warm-weather sports equipment and then move into accessible garage location

SOURCE: American Home Shield

Home Improvement

Federal Energy Efficiency Tax Credits

   The Federal Government continues to provide incentives to
   homeowners to help encourage improvements in energy
   efficiency. Credit opportunities exist for everything from
   cars and appliances to homes and buildings. With more
   available options for energy-efficient appliances and
   products, a tax incentive is a wonderful way for the public
   to become more aware of green alternatives.

   Credits are available for both residential and commercial
   buildings. Many credits are based on standards for the
American Society of Heating, Refrigerating and Air-Conditioning Engineers (ASHRAE)
or Energy Star, and must meet International Energy Conservation Code (IECC). Tax
credit details for home improvements:

  • Improvements must be installed between January 1, 2009 and December 31, 2010.
  • They must be for your principal residence, except for geothermal heat pumps, solar water heaters, solar panels, and small wind energy systems, where second homes and rentals qualify.
  • Each must have a Manufacturer Certification Statement3 to qualify.
  • For record keeping, save the Manufacturer Certification Statement and your receipt.
  • Claim improvements made in 2009 on your 2009 taxes (filed by April 15, 2010). Use IRS Tax Form 5695 (2009 version), which will be available in late 2009 or early 2010.
  • If you are building a new home, you can qualify for the tax credit for geothermal heat pumps, photovoltaics, solar water heaters, small wind energy systems and fuel cells (Source: EnergyStar.gov)
  • Alternatively, in order for the credit to qualify biomass stoves, Heating, Ventilation, and Air Conditioning (HVAC), insulation, roofs, water heaters, and/or windows and doors, these improvements must occur in an existing home that is your principal residence. (Source: EnergyStar.gov)
  • $1,500 is the maximum total amount you can claim for products placed in service in 2009 and 2010 for most home improvements. Exceptions – in effect through 2016 – are geothermal heat pumps, solar water heaters, solar panels, fuel cells, and small wind energy systems, which are not subject to this cap.

An eligible residential project could include new roofing using metal or reflective shingles that meet ENERGY STAR standards. In this case, the tax credit would be for 30% of the cost of roofing materials only, up to $1,500. This is one of many examples of residential upgrades. The ENERGY STAR website and http://www.dsireusa.org/ have many more specific examples (and ideas) for green residential upgrades and describe any stipulations there in.

Commercial Sector

Tax credits in the commercial sector include a tax deduction of up to $1.80 per square foot for owners or designers of new or existing commercial buildings that can save at least 50% of the heating and cooling energy of a building meeting ASHRAE Standard 90.1-2001. Windows, doors, and skylights are also a great way to take advantage of this credit program.

For a complete list of products and requirements, qualifications, and instructions on how to apply for these credits, visit the Energy Star website (energystar.gov/taxcredits). You can also find Frequently Asked Questions about the tax credits there.

Article written by
Amanda Goucher who is NAR's Green Designation Coordinator.